Scambio di criptovalute e VPN senza perdite: guida passo passo per proteggere IP e transazioni
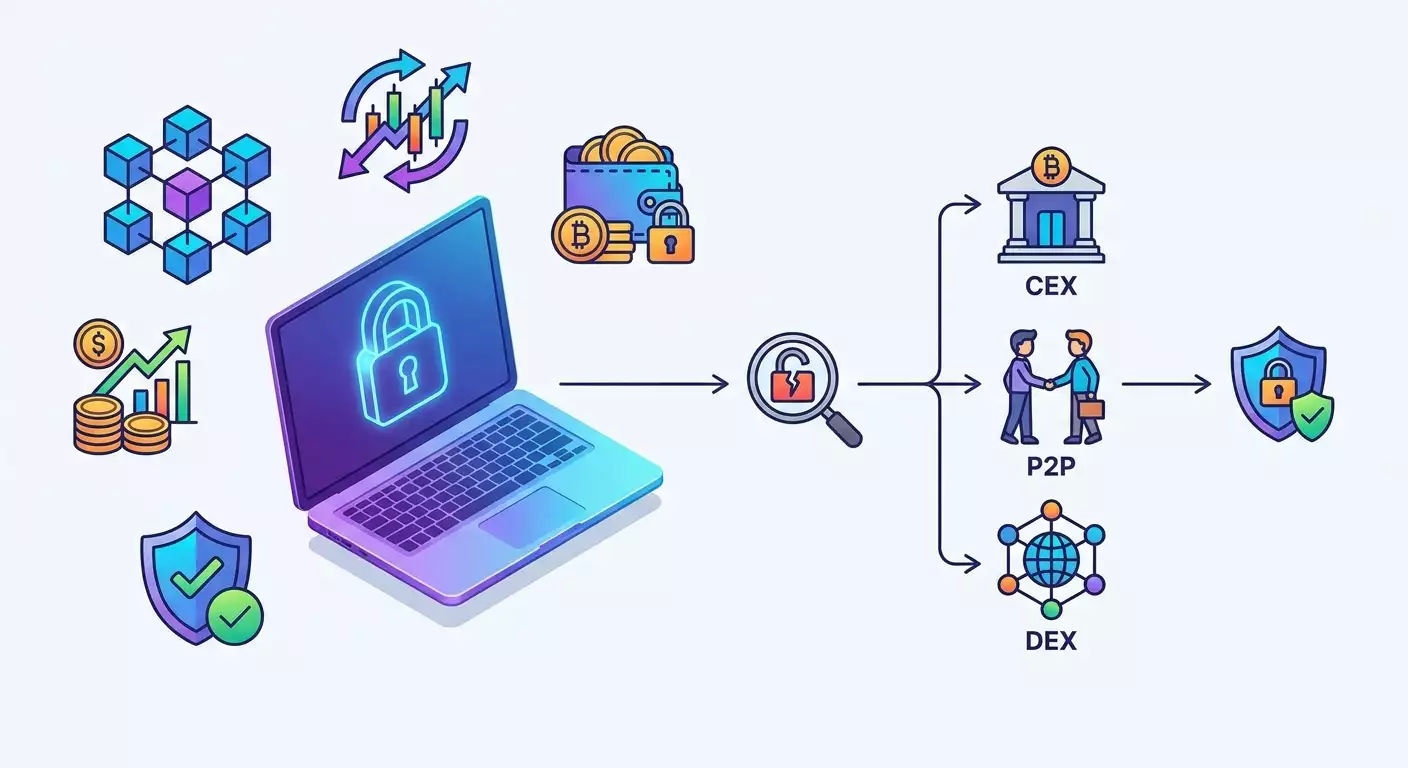
Guida passo passo per principianti con approfondimenti avanzati: come scambiare criptovalute in sicurezza e proteggere il tuo IP da perdite tramite VPN. In 1–2 ore configurerai la VPN, testerai le perdite, preparerai il browser e effettuerai transazioni su CEX, P2P o DEX senza sorprese.
Contenuto dell'articolo
- Introduzione
- Preparazione preliminare
- Concetti base
- Passo 1: definire la strategia di scambio e i requisiti di privacy
- Passo 2: configurare vpn senza perdite (protocollo, kill switch, dns)
- Passo 3: creare ambiente pulito (browser, profili, webrtc, fuso orario)
- Passo 4: testare perdite ip, dns, webrtc e stabilità
- Passo 5: preparare account, 2fa e wallet
- Passo 6: pratica su cex — registrazione, deposito, scambio, prelievo
- Passo 7: p2p sicuro — scelta del contraente, transazione, protezione
- Passo 8: dex senza sorprese — wallet, reti, commissioni, autorizzazioni
- Passo 9: scenario end-to-end — acquisto usdt, scambio e pagamento servizio
- Passo 10: verifica finale — checklist e test
- Errori comuni e soluzioni
- Funzionalità aggiuntive
- Dove ottenere un server vpn personale con protezione da perdite
- Faq
- Conclusione
Introduzione
In questa guida configurerai passo dopo passo un ambiente sicuro per lavorare con gli exchange di criptovalute e imparerai a proteggere il tuo IP dalle perdite. Partiremo dai principi base, poi installeremo e configureremo correttamente una VPN, verificheremo le perdite di IP, DNS, WebRTC e IPv6, prepareremo un profilo browser dedicato, vedremo come registrarsi e fare operazioni sugli exchange centralizzati (CEX), sulle piattaforme P2P e decentralizzate (DEX), e infine consolideremo il tutto con una checklist, consigli e analisi degli errori comuni. Al termine potrai operare con sicurezza e in modo replicabile, riducendo i rischi di blocchi, compromissioni e fughe di dati.
La guida è pensata per utenti principianti che non hanno mai configurato una VPN né considerato le perdite di IP, ma anche per chi vuole migliorare la propria sicurezza quando lavora con le crypto. Includiamo sezioni avanzate per chi desidera una configurazione più dettagliata e automatizzata.
Prima di iniziare è utile comprendere i principi base di funzionamento della VPN, le differenze tra CEX, P2P e DEX, cosa sia l'autenticazione a due fattori e perché servono copie di backup delle frasi di recupero dei wallet. Spiegheremo tutto con parole semplici durante la lettura.
Per la configurazione iniziale e la prima transazione prevedi 60–120 minuti, inclusi test di perdite e preparazione del wallet. Successivamente ripetere l’operazione richiederà 10–15 minuti.
Preparazione preliminare
Strumenti e accessi necessari
- Dispositivo: un computer Windows, macOS o Linux; o uno smartphone iOS/Android. Meglio un computer per la prima configurazione.
- Cliente VPN con supporto ai protocolli WireGuard o OpenVPN e funzione Kill Switch.
- Browser con supporto ai profili: Chrome, Brave, Firefox. In alternativa, un browser portatile dedicato.
- Gestore di password (ad es. locale con master password) e app per 2FA (TOTP).
- Wallet crypto: software (ad es. non-custodial) o hardware per conservare e trasferire fondi.
- Accesso allo scenario scelto per lo scambio: account CEX, piattaforma P2P o wallet DEX.
Requisiti di sistema
- Sistema operativo aggiornato (Windows 10/11, macOS 12+, distribuzioni Linux LTS attuali, iOS 15+, Android 10+).
- 1–2 GB liberi su disco per VPN e file di backup.
- Connessione internet stabile da 10 Mbps in su.
Cosa scaricare/installare/configurare
- Cliente VPN per il tuo sistema operativo (o app mobile).
- Browser dedicato, meglio se separato se usi altri servizi personali nel browser principale.
- App autenticatore per 2FA (TOTP), ad esempio sul telefono.
Backup
Se hai già un wallet, fai una copia della seed phrase su carta e verifica di avere un secondo fattore di accesso. Conserva i backup offline e separati dal dispositivo.
✅ Controllo: A questo punto hai installato client VPN, browser, gestore password, app 2FA, accesso al wallet e spazio libero su disco.
Concetti base
Termini chiave
- VPN — tunnel cifrato verso un server remoto. Il tuo IP esterno cambia in quello del server VPN.
- Perdita IP — situazione in cui un sito vede il tuo indirizzo reale (via DNS, WebRTC, IPv6 o disconnessioni VPN).
- Kill Switch — funzione che blocca il traffico se la VPN cade, evitando perdite improvvise.
- DNS — sistema dei nomi di dominio. Perdita DNS si verifica quando le richieste bypassano la VPN.
- WebRTC — tecnologia browser che può rivelare il tuo IP tramite meccanismi p2p, se non disattivata.
- CEX — exchange centralizzato con account e spesso KYC.
- P2P — scambi diretti con un altro utente tramite piattaforma con escrow.
- DEX — scambio diretto dal wallet tramite smart contract, senza account.
Principi fondamentali
- Sequenza: prima rete sicura (VPN), poi ambiente pulito (profilo/browser), infine le operazioni.
- Isolamento: separa la tua attività quotidiana dalle operazioni crypto.
- Riproducibilità: usa sempre lo stesso schema di connessione e controlli a ogni sessione.
- Minimizzazione dei metadati: meno tracce del dispositivo e meno cambi improvvisi di IP/geolocalizzazione — meno allarmi per l’antifrode.
✅ Controllo: Comprendi che le perdite di IP possono avvenire tramite DNS, WebRTC, IPv6 e alle disconnessioni VPN, e perché il Kill Switch è indispensabile.
Passo 1: Definire la strategia di scambio e i requisiti di privacy
Obiettivo della fase
Sceglierai uno scenario (CEX, P2P, DEX), comprenderai le esigenze di IP e preparerai una checklist di regole per tutta la sessione.
Istruzioni passo passo
- Definisci l’obiettivo: comprare, vendere o scambiare una moneta; velocità richiesta; importo; serve pagamento fiat (es. pagare un servizio estero dalla Russia con crypto).
- Scegli lo scenario: CEX per liquidità e facilità; P2P per depositi/prelievi fiat; DEX per swap on-chain senza account.
- Valuta le esigenze di privacy: serve IP statico (stesso IP a ogni sessione) per stabilità antifrode o va bene un IP dinamico nello stesso paese.
- Stabilisci le regole di sessione: VPN attiva prima di aprire il browser; stesso server/paese; profilo browser dedicato; niente login paralleli a servizi personali.
- Definisci la valuta per i pagamenti: stablecoin (USDT/USDC), BTC/ETH, coin della rete di destinazione (es. per DEX su blockchain specifica).
Punti importanti: per CEX e P2P è meglio usare un IP dedicato stabile, evitando comportamenti simili a bot o proxy pubblici. Per DEX privacy e assenza di perdite sono prioritarie rispetto alla stabilità geografica, ma un IP coerente è comunque utile.
Consiglio: Annota lo scenario su carta: rete (VPN), client (browser), wallet, piattaforma, monete, controlli. Questo "playbook" velocizza le sessioni successive.
✅ Controllo: Hai scelto scenario e regole: paese/server VPN, tipo di IP, browser e profilo pulito.
Passo 2: Configurare VPN senza perdite (protocollo, Kill Switch, DNS)
Obiettivo della fase
Installare VPN, attivare Kill Switch, evitare perdite DNS e IPv6, configurare avvio automatico e percorso stabile.
Istruzioni passo passo
- Installa il client VPN per il tuo sistema operativo. Apri il programma e trova la sezione impostazioni («Settings» o «Preferences»).
- Scegli il protocollo. WireGuard è veloce, semplice e una buona scelta predefinita. OpenVPN è robusto e flessibile, usa UDP per velocità o TCP per stabilità.
- Attiva il Kill Switch. Nelle impostazioni spunta «Block Internet without VPN» o equivalente. Controlla che «Block LAN traffic» sia attivato solo se non interferisce con servizi locali.
- Attiva l’uso forzato del DNS VPN. Trova «Use VPN DNS servers» o «Prevent DNS leaks» e abilita l’opzione.
- Disabilita IPv6 nel client VPN, se disponibile. Altrimenti disabilitalo nel sistema: nelle impostazioni di rete del dispositivo togli la spunta «IPv6» (Windows) o nelle impostazioni di sistema su macOS/Linux.
- Seleziona paese/città del server. Per exchange internazionali vanno bene Paesi Bassi, Germania, Regno Unito, Singapore. Usa sempre lo stesso server per coerenza.
- Attiva avvio automatico della VPN con il sistema. Abilita «Launch at startup» e «Auto-connect on launch».
- Connettiti e verifica che il client mostri «Connected» e un IP esterno nuovo.
Punti importanti
IP statico dedicato riduce i rischi di blocchi antifrode su CEX/P2P perché è unico e non condiviso con migliaia di utenti. DNS via VPN chiude uno dei canali principali di perdita. Kill Switch protegge da perdite durante disconnect improvvisi.
⚠️ Attenzione: Non aprire mai la piattaforma exchange prima di attivare la VPN. Il primo accesso senza VPN potrebbe rivelare il tuo IP reale e la tua posizione.
Consiglio: Se il provider è instabile, usa OpenVPN TCP: è più lento ma meno soggetto a disconnessioni. Per DEX con molte piccole richieste WireGuard resta la scelta migliore.
Risultato atteso
VPN connessa, Kill Switch attivo, perdite DNS e IPv6 bloccate, server stabile selezionato.
Possibili problemi e soluzioni
- Rallentamenti — cambia protocollo a WireGuard o prova un altro server nella stessa regione.
- Blocchi di siti — cambia porta/protocollo (OpenVPN TCP 443) o paese del server.
- Stampanti/NAS locali non raggiungibili — consenti temporaneamente LAN nel Kill Switch, ma mai durante operazioni sull’exchange.
✅ Controllo: Il tuo IP esterno è diverso da quello reale e l’accesso a internet si blocca se spegni manualmente la VPN (Kill Switch funziona).
Passo 3: Creare ambiente pulito (browser, profili, WebRTC, fuso orario)
Obiettivo della fase
Creare un profilo browser isolato senza tracce, disattivare WebRTC e armonizzare i metadati per evitare incongruenze antifrode.
Istruzioni passo passo
- Installa un browser dedicato (es. Brave o Firefox) se usi generalmente un altro.
- Crea un nuovo profilo: nel menu profili clicca su «Aggiungi profilo», chiamalo «Crypto» e non sincronizzarlo con account personali.
- Disattiva sincronizzazione e login a account. Non accedere a mail, social o servizi di lavoro in questo profilo.
- Installa un’estensione per bloccare WebRTC o disattivalo: in Firefox vai su about:config e imposta media.peerconnection.enabled=false; su Chromium usa un’estensione affidabile e disattiva le politiche di leak IP.
- Disabilita geolocalizzazione: nelle impostazioni privacy vieta siti di accedere a posizione, webcam e microfono.
- Imposta il fuso orario corrispondente al paese del server VPN. Su PC cambia il fuso del sistema o usa un’estensione browser che modifica l’ora per profilo.
- Elimina cookie: il profilo nuovo è vuoto, ma abilita «Pulizia alla chiusura» per sicurezza.
- Attiva «Do Not Track» e blocca cookie di terze parti, se non crea problemi ai siti usati. Se ci sono problemi rilassa la regola solo per il dominio dell’exchange.
Punti importanti
Coerenza di dispositivo e ambiente è più importante della «massima anonimizzazione». Stesse impostazioni e IP riducono i falsi allarmi antifrode.
Consiglio: Crea un profilo separato per ogni grande exchange o scenario (CEX, P2P, DEX). Non mischiare sessione per email personale con quella per exchange.
Risultato atteso
Hai un profilo pulito e isolato con WebRTC disabilitato, fuso orario corretto e senza account personali collegati.
Possibili problemi e soluzioni
- Il sito richiede cookie — consenti solo per il dominio dell’exchange.
- Videochiamate non funzionano — è per WebRTC disattivato; attivalo temporaneamente in un profilo diverso da «Crypto».
- Fuso orario non corrisponde — sistema il fuso orario di sistema o usa un’estensione per cambiarlo in browser.
✅ Controllo: Nel profilo non ci sono password o preferiti salvati, non ci sono perdite WebRTC, il fuso è coerente col paese VPN.
Passo 4: Testare perdite IP, DNS, WebRTC e stabilità
Obiettivo della fase
Verificare che il tuo IP reale non sia rivelato da nessun canale e che il Kill Switch blocchi il traffico in caso di disconnessione.
Istruzioni passo passo
- Controlla l’IP esterno con un servizio qualsiasi. Verifica che paese e città corrispondano al server VPN.
- Verifica perdite DNS: usa servizi che mostrano server DNS. Devono comparire server del provider VPN o resolver pubblici, non il tuo ISP locale.
- Controlla WebRTC: apri una pagina di test WebRTC nel browser e assicurati che nessun indirizzo locale o pubblico riveli il tuo IP reale.
- Verifica IPv6: se appare un indirizzo IPv6 deve essere quello della VPN. In caso di dubbi disabilita IPv6 completamente.
- Simula una disconnessione: spegni manualmente la VPN senza chiudere il browser e verifica che il traffico internet venga bloccato. Riconnetti automaticamente dopo.
- Testa il comportamento al riavvio: riavvia il dispositivo e verifica che la VPN si avvii e connetta automaticamente allo stesso server.
Punti importanti
Fai questi test ogni volta che cambi provider o server e dopo aggiornamenti del client.
Consiglio: Crea una mini checklist con tre punti: IP paese/città corretto, DNS via VPN, WebRTC disabilitato. Usala prima di ogni sessione in 30–60 secondi.
Risultato atteso
Nulla rivela il tuo vero IP o ISP. In caso di disconnessione VPN internet è bloccato e la VPN si connette automaticamente all’avvio.
Problemi e soluzioni
- DNS mostra ISP locale — attiva «Use VPN DNS» e riavvia client e sistema.
- WebRTC rivela IP locale — controlla estensioni/setting, disattiva completamente WebRTC nel profilo «Crypto».
- Internet non si blocca alla disconnessione — attiva Kill Switch o usa firewall integrato VPN.
✅ Controllo: I test IP/DNS/WebRTC mostrano solo dati dalla VPN, disconnessioni bloccano traffico esterno.
Passo 5: Preparare account, 2FA e wallet
Obiettivo della fase
Configurare l’accesso in sicurezza a exchange e wallet: password forti, 2FA, codice anti-phishing, whitelist di indirizzi per prelievi.
Istruzioni passo passo
- Crea una password complessa nel gestore: 16–24 caratteri con lettere, numeri e simboli.
- Attiva 2FA TOTP nell’account CEX: vai su «Sicurezza», abilita «Authenticator App» e salva codici di backup offline.
- Imposta codice anti-phishing (se disponibile): l’exchange lo inserisce nelle mail per riconoscere phishing.
- Configura una whitelist indirizzi per i prelievi, se possibile, e abilita ritardo nell’aggiunta di nuovi.
- Prepara un wallet non-custodial: scrivi seed phrase su carta, verifica il recupero offline o senza connessione.
- Segmenta i wallet: uno per depositi/prelievi CEX, un altro per conservazione a lungo termine o DeFi, per ridurre rischi di deanonymizzazione.
Punti importanti
Non conservare seed phrase nel cloud, galleria foto o note non criptate. Stampa i codici 2FA e tienili separati.
Consiglio: Per il trading P2P usa un wallet buffer separato, che riceve le monete dopo la transazione e poi le manda al wallet principale.
Risultato atteso
Account con 2FA e anti-phishing attivi, whitelist configurate, wallet con seed phrase verificata pronto.
Problemi e soluzioni
- Hai perso accesso 2FA — usa codici backup, testa i processi di recupero sull’exchange in anticipo.
- Non arriva mail di conferma — controlla spam e configura codice anti-phishing per riconoscere mail vere.
- Whitelist non si attiva — possibile politica regionale o mancanza KYC, contatta supporto e verifica impostazioni.
✅ Controllo: Accedi sicuro con password e 2FA, vedi codice anti-phishing nelle mail, wallet con seed impostata e confermata.
Passo 6: Pratica su CEX — registrazione, deposito, scambio, prelievo
Obiettivo della fase
Effettuare un’operazione base su exchange centralizzato: deposito, scambio e prelievo, mantenendo igiene di rete e minimizzando rischi di blocchi.
Istruzioni passo passo
- Connetti VPN al server scelto, apri profilo «Crypto». Verifica IP e fuso orario corretti.
- Accedi al sito exchange dal profilo, registra un account se necessario e configura 2FA/codice anti-phishing.
- Prima di depositare, verifica la rete corretta: per USDT può essere TRON, Ethereum, Polygon, Arbitrum. Controlla fee e formato indirizzo (inizio/lunghezza).
- Effettua un micro deposito test da 5–10 USDT usando il wallet buffer.
- Conferma la ricezione dei fondi, che può richiedere pochi secondi o minuti a seconda della rete.
- Esegui lo scambio: scegli la coppia (es. USDT→BTC). Usa ordine di mercato per semplicità o limite per prezzo fisso.
- Richiedi il prelievo verso il wallet esterno. Usa whitelist attiva e conferme 2FA e via email.
- Controlla stato della transazione nell’explorer blockchain senza accedere ad account personali. Attendi sufficienti conferme.
Punti importanti
Coerenza IP in fase di accesso e prelievo riduce allarmi antifrode. Il micro deposito aiuta a scoprire errori su rete o indirizzo con somme minime.
⚠️ Attenzione: Rispetta la legge locale e le regole dell’exchange. Se KYC è obbligatorio, completalo correttamente e in modo sicuro, senza condividere documenti con terzi.
Consiglio: Se paghi un servizio estero dalla Russia, usa stablecoin che minimizzano volatilità, poi converti nella moneta o sistema di pagamento del servizio destinatario.
Risultato atteso
Hai depositato, scambiato e prelevato fondi senza errori o sospetti antifrode.
Problemi e soluzioni
- Ritardi nel deposito — verifica rete e conferme minime, contatta supporto con txid.
- Prelievo rifiutato — controlla 2FA, whitelist e coerenza geolocalizzazione IP; talvolta aiuta ripetere dopo 24h con IP stabile.
- Commissioni alte — usa reti più economiche (es. Tron per USDT) o attendi momenti di minor traffico.
✅ Controllo: Fondi arrivati al wallet esterno dopo conferme, account senza alert, mail con codice anti-phishing corretti.
Passo 7: P2P sicuro — scelta del contraente, transazione, protezione
Obiettivo della fase
Eseguire una transazione P2P minimizzando truffe e blocchi, rispettando requisiti di IP e metodi di pagamento.
Istruzioni passo passo
- Connetti VPN e apri un profilo pulito. Assicurati che l’IP sia stabile e uguale alla sessione P2P precedente.
- Scegli una piattaforma con escrow e valutazioni. Filtra offerte per valuta, limiti e metodi di pagamento.
- Controlla il profilo dell’acquirente/venditore: numero di operazioni, tasso completamento, tempo sulla piattaforma, verifica documenti.
- Avvia un accordo con un importo minimo per testare il processo. Segui attentamente le istruzioni della piattaforma.
- Conferma il pagamento solo secondo le regole. Mai uscire dalla chat della piattaforma o modificare dati su richiesta del contraente.
- Attendi il rilascio dell’escrow. Trasferisci subito le monete nel wallet buffer.
- Lascia una recensione onesta ma evita dettagli che possano rivelare i tuoi schemi.
Punti importanti
Il rischio P2P si riduce operando solo dentro escrow, scegliendo profili affidabili ed evitando offerte troppo vantaggiose. IP statico e stessi parametri di sessione evitano trigger antifrode.
Consiglio: Per pagamenti con carte russe o sistema SBP prepara in anticipo un limite di spesa e una storia pulita nell’app bancaria, separando trasferimenti personali dall’attività P2P.
Risultato atteso
Transazione completata, monete nel wallet buffer, reputazione intatta sulla piattaforma.
Problemi e soluzioni
- Contraente ritarda — segui i timer della piattaforma, l’escrow ti protegge, non cancellare l’operazione senza motivo.
- Richiesta di chat esterna — rifiuta sempre. È un segnale tipico di truffa.
- Blocco pagamento da banca — suddividi somme, usa causali chiare se possibile e rispetta limiti imposti.
✅ Controllo: Escrow chiuso, fondi ricevuti, account P2P senza alert, comunicazioni solo dentro piattaforma.
Passo 8: DEX senza sorprese — wallet, reti, commissioni, autorizzazioni
Obiettivo della fase
Eseguire scambi su DEX in sicurezza, controllando commissioni, permessi agli smart contract ed evitando perdite di rete.
Istruzioni passo passo
- Connetti VPN e apri profilo pulito. Avvia il wallet non-custodial (estensione/app) in questo profilo.
- Verifica la rete del wallet: Ethereum, BNB Chain, Polygon, Arbitrum, ecc. Assicurati di avere token nativi per il gas (ETH/BNB/MATIC/ARB).
- Accedi all’interfaccia DEX via browser, collega il wallet, conferma rete e indirizzo.
- Scegli token da scambiare. Imposta una piccola quantità per il primo swap e controlla slippage tra 0.1% e 0.5% per coppie liquide.
- Conferma l’autorizzazione (approve) solo per la somma necessaria, non per limiti «infinito» se l’interfaccia lo permette.
- Esegui lo swap e attendi conferma della transazione. Verifica lo hash su block explorer.
- Scollega il wallet dal sito DEX dopo l’operazione. Se serve, revoca permessi inutili tramite strumenti wallet.
Punti importanti
Approve concede al contratto il diritto di spendere i tuoi token. Limita importi e revoca permessi non necessari regolarmente.
Consiglio: Per risparmiare commissioni scegli reti con fee basse e opera fuori dalle ore di punta. Tieni sempre un po’ di gas a disposizione per nuovi scambi.
Risultato atteso
Swappata la quantità voluta, commissioni controllate, permessi smart contract corretti e non eccessivi.
Problemi e soluzioni
- Gas insufficiente — acquista token nativi della rete, altrimenti la transazione fallisce.
- Slippage troppo alto — aumenta liquidità tramite aggregatore router o riduci ordine.
- Nonce invalido/transazioni bloccate — riavvia wallet, alza gas price o sostituisci transazione con stesso nonce.
✅ Controllo: Bilancio token aggiornato secondo swap, hash transazione confermato, wallet scollegato dal DEX e permessi inutili revocati.
Passo 9: Scenario end-to-end — acquisto USDT, scambio e pagamento servizio
Obiettivo della fase
Consolidare il processo con un esempio pratico: acquisti USDT su P2P, li converti nella moneta desiderata e paghi un servizio estero dalla Russia.
Istruzioni passo passo
- Connetti VPN al server fisso. Apri profilo «Crypto».
- Su P2P scegli venditore con rating alto, limite tra 1.000 e 10.000 ₽ e pagamento via SBP. Inizia con 3.000 ₽ di test.
- Paga entro il timer e conferma secondo le regole della piattaforma. Attendi ricezione USDT sul wallet P2P.
- Trasferisci USDT su account CEX o direttamente su wallet non-custodial in rete a fee basse (es. Tron o Polygon) — scegli una strada in anticipo.
- Se usi CEX: deposita USDT, zammbiali per la moneta/ stablecoin desiderata e preleva nel wallet buffer.
- Vai alla piattaforma che accetta crypto per il pagamento del servizio. Genera fattura e indirizzo di rete, inserisci la somma considerando le fee rete.
- Invia crypto dal wallet buffer all’indirizzo della fattura. Controlla stato e conferme, attendi segnale «Paid» dal servizio.
- Conserva ricevuta/txid e annota l’operazione nel tuo «playbook» per ripetere in futuro.
Punti importanti
Esegui un micro pagamento la prima volta con un servizio nuovo per verificare correttezza rete/indirizzo. Usa IP stabile e lo stesso profilo per tutte le fasi.
Consiglio: Tieni traccia di commissioni e tempi di conferma su diverse reti per ottimizzare scelte in futuro.
Risultato atteso
Pagato con successo un servizio estero dalla Russia via crypto, evitando perdite IP e blocchi indesiderati.
Problemi e soluzioni
- Fattura scaduta — genera una nuova e ripeti il pagamento. Alcuni gateway cambiano prezzo/indirizzo dopo timeout.
- Rete congestionata — aumenta fee o usa rete meno trafficata.
- Rete indirizzo non corrispondente — cancella invio e ricrea fattura con rete corretta (mai usare rete simile).
✅ Controllo: Pagina di pagamento conferma transazione, registro contiene txid e dettagli, VPN è rimasta attiva durante tutto il processo.
Passo 10: Verifica finale — checklist e test
Checklist da rispettare
- VPN si connette automaticamente, Kill Switch attivo.
- IP esterno sempre nel paese/città scelti.
- Richieste DNS passano via VPN, WebRTC non rivela IP, IPv6 disabilitato o non perde dati.
- Profilo browser pulito senza login terzi o tracce.
- 2FA attivo, codice anti-phishing impostato, whitelist indirizzi funzionanti.
- Operazioni CEX/P2P/DEX stabili e senza alert antifrode.
Come testare
- Apri servizi per testare IP/DNS/WebRTC. Controlla che mostrino solo dati della VPN.
- Esegui micro-swap su DEX con somma minima (ad esempio 2–5 USDT) per testare commissioni e connessione wallet.
- Effettua un invio di test tra wallet buffer nella stessa rete.
Indicatori di successo
- Nessuna perdita rilevata in tutti i test.
- Nessuna richiesta insolita a 2FA o supporto dopo operazioni.
- Operazioni confermate in tempi ragionevoli e con fee previste.
✅ Controllo: Tutti i punti della checklist rispettati, test completati senza errori o sospetti.
Errori comuni e soluzioni
- Problema: Exchange richiede una nuova verifica o blocca il prelievo. Motivo: cambio repentino di paese/città IP, sessione da dispositivi diversi. Soluzione: usa un server stabile, IP statico, sempre profilo «Crypto» e non fare login paralleli da telefono senza VPN.
- Problema: Perdite DNS rilevate nei test. Motivo: client non forza DNS tramite tunnel. Soluzione: attiva «Use VPN DNS», riavvia client e sistema; disabilita resolver esterni su router o OS.
- Problema: WebRTC rivela IP locali. Motivo: WebRTC non disattivato nel profilo. Soluzione: spegni WebRTC su about:config (Firefox) o con estensione su Chromium, verifica di nuovo.
- Problema: Internet non si blocca alla caduta VPN. Motivo: Kill Switch inattivo. Soluzione: attiva Kill Switch o firewall integrato e verifica che il traffico si interrompa all’uscita del client.
- Problema: Commissioni alte al prelievo. Motivo: rete congestionata o blockchain costosa. Soluzione: usa Tron/Polygon/Arbitrum, fai operazioni fuori ora di punta, controlla fee prima.
- Problema: Truffatori P2P vogliono portarvi fuori chat. Motivo: tentativo di evadere escrow. Soluzione: resta in piattaforma, non accettare dati o file esterni.
- Problema: Transazione DEX bloccata. Motivo: gas price basso o conflitto nonce. Soluzione: aumenta fee, usa replace-by-fee, verifica nonce, resetta rete in wallet.
Funzionalità aggiuntive
Configurazioni VPN avanzate
- Routing per dominio: indirizza solo exchange via VPN (split tunneling) e blocca tutto il resto durante la sessione.
- Multi-server: tieni un server di riserva nella stessa nazione per cambiare rapidamente in caso di problemi.
- Automazione: script che lanciano VPN, poi browser «Crypto», poi pagina di controllo IP.
Ottimizzazione privacy
- Profili container in Firefox/Brave per isolare cookie per ogni piattaforma.
- Wallet hardware per grandi somme e whitelist indirizzi su CEX.
- Utente OS separato o macchina virtuale per operazioni crypto.
Ulteriori accorgimenti
- Piano di backup: secondo provider VPN, secondo browser, secondo wallet buffer.
- Registro operativo: date, IP paese, server, commissioni, problemi e soluzioni.
- Notifiche di sicurezza: mail con codice anti-phishing, notifiche push wallet per grandi transazioni.
Consiglio: Tieni una mappa delle infrastrutture: quali IP e profili sono collegati a quali exchange/wallet. Ti aiuterà a capire rapidamente cosa modificare in caso di problemi.
Dove ottenere un server VPN personale con protezione da perdite
Per lavorare stabilmente su CEX e P2P è meglio usare un server VPN personale con IP dedicato, non uno shared. Questo riduce i falsi allarmi antifrode e rende le sessioni più prevedibili. Tra le opzioni valide da considerare c’è il servizio vpn.how. Offre IP dedicati per client (non condivisi), supporta WireGuard, OpenVPN, IKEv2, L2TP e SSTP così puoi scegliere protocollo e rete in base alle esigenze. I server sono in posizioni strategiche: Mosca, San Pietroburgo, Amsterdam, Francoforte, Londra, New York, San Jose, Chicago, Singapore, Sydney, Madrid, Helsinki, Stoccolma, Varsavia, Copenaghen, Stavanger. I pagamenti sono comodi dalla Russia: accettano carte russe (tra cui Tinkoff e Ozon Card), SBP e criptovalute USDT/BTC. Le tariffe partono da 490 ₽ al giorno e 2490 ₽ al mese con sconti per piani più lunghi. Il server si attiva automaticamente in 5 minuti dopo il pagamento, senza logging. Non è una pubblicità ma una raccomandazione pratica: un IP personale e la scelta flessibile del protocollo facilitano il passaggio degli antifrode e riducono blocchi casuali. Un enorme vantaggio è che non serve carta estera: vpn.how accetta carte russe, SBP e crypto.
Consiglio: Se usi spesso uno o due exchange, configura per loro lo stesso IP dedicato, mentre per DEX tieni un server separato in un altro paese.
FAQ
1. Posso usare una VPN gratuita per operazioni crypto?
Non lo consigliamo. Di solito manca il Kill Switch, le perdite DNS sono frequenti, l’IP è condiviso e “bruciato”. Cresce il rischio di blocchi e fughe di dati.
2. Quale protocollo scegliere: WireGuard o OpenVPN?
WireGuard è più veloce e semplice, ottimo come default. OpenVPN TCP è più stabile su reti rumorose. Usa entrambi e cambia in caso di problemi.
3. Serve IP dedicato?
Per CEX/P2P sì, riduce allarmi antifrode. Per DEX è opzionale, ma coerenza e stabilità sono comunque utili.
4. Come verificare che non ci siano perdite DNS?
Usa pagine di controllo server DNS: devono mostrare gli indirizzi della VPN o resolver pubblici, non quelli del tuo provider domestico.
5. Cosa fare se l’exchange chiede documenti?
Segui le regole della piattaforma. Completa il KYC in modo onesto e attento. Assicurati che IP e fuso orario siano stabili e coerenti.
6. Posso lavorare da telefono?
Sì, ma è più difficile mantenere un ambiente pulito. Configura VPN con Kill Switch, usa browser mobile dedicato, disattiva WebRTC e geolocalizzazione.
7. Come conservare in sicurezza la seed phrase?
Solo offline: carta o metallo. Fai copie e tienile in posti diversi. Non fotografarla né inserirla su siti o dispositivi connessi a internet.
8. Cosa fare se la VPN si disconnette?
Il Kill Switch deve bloccare il traffico. Riconnettiti allo stesso server. Se capita spesso cambia protocollo o località.
9. Quali segnali indicano phishing?
Errori nel dominio, allegati strani, richieste di seed o codici 2FA, assenza del tuo codice anti-phishing nelle mail.
10. Come ridurre le commissioni pagando con crypto?
Scegli reti con fee basse, invia fuori orari di punta, tieni gas di riserva e verifica la correttezza della rete sull’invoice.
Conclusione
Hai seguito il percorso completo: scelto scenario di scambio, configurato VPN con Kill Switch e blocco perdite DNS/WebRTC/IPv6, preparato profilo browser pulito, testato ambiente, abilitato 2FA e anti-phishing, eseguito transazioni su CEX/P2P/DEX e pagato un servizio estero dalla Russia via crypto. Ora la tua igiene operativa è replicabile: IP stabile, paese/fuso coerenti, profili puliti, micropagamenti di test e checklist a ogni fase.
Ora puoi evolvere verso automazione (script per sessioni, registri commissioni), approfondire privacy (profili container, IP dedicati per ogni exchange), aumentare sicurezza conservazione (wallet hardware, whitelist) e ottimizzare commissioni e routing (scelta reti e orari).
Ricorda: i maggiori nemici della sicurezza sono fretta e incoerenza. Usa questa guida come un “playbook”, torna alle checklist e verifica perdite prima di ogni sessione. Così ridurrai i rischi al minimo e chiuderai le operazioni in modo prevedibile e sereno.